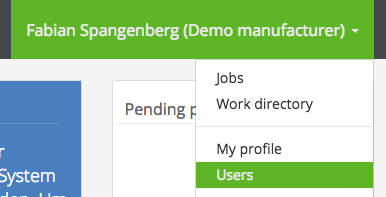
To create other users, your own account requires the permission "Manage company". If this is available, you are able to select "Users" from the drop-down menu at the top right of the navigation bar.

Here you see the users already created for your company. Click on the "Create user" button to create another access.
At least one e-mail address is required for the new access. Optionally, you can define a favorite username. But we recommend that to leave this field blank and to use the registered e-mail address as your login name.
Further contact details, such as name and surname, phone number and position, are optional. By activating the option "Public contact", this user is displayed as a public contact person.

In the "Notifications" area, you can control how this user is notified by OXOMI. It is possible to deactivate notifications completely and to control the rhythm of the portal news. The latter can also be deactivated in this setting.

In the "Permissions" area, you can control which rights this new user should receive. Please read the respective help page Permissions.

If you want to create a user as a "locked" user, for example because the user is inactive or no longer responsible, activate the "Locked" option in the "Security" area of the input mask. Locked users can no longer sign in and thus make no further changes.
Once you have made all the necessary information about the new user, click on "Save" at the bottom of the page for finishing the creation of the new user.
Finally give the newly created user an initial password so that he can log in. You have the option of assigning your own password or a system generated password. The latter is automatically sent to the new user via e-mail.
You will find the relevant functions in the user overview, for the users you created. This is also the way you can later regenerate the passwords of your users.
